
[ad_1]
The way to Take Scrolling Screenshots on iPhone
With the rising variety of iPhone customers, many individuals are on the lookout for methods to take a screenshot on their iPhones. However what intrigues plenty of customers is tips on how to take a scrolling screenshot on iPhone, as it’s not as simple as it’s on Android gadgets. Nevertheless, with the most recent model of iOS – iOS 17, Apple has launched the flexibility to avoid wasting scrolling screenshots as common photographs within the Photographs app in your iPhone. On this article, we’ll information you on tips on how to take and look at scrolling screenshots in your iPhone.
Taking Scrolling Screenshots on iPhone
With the native iOS 17 choice, now you can take scrolling screenshots of varied content material corresponding to net pages, paperwork, PDFs, notes, or emails. You’ll be able to seize your entire content material of a web page even when it has a number of pages. After capturing the scrolling screenshot, you may select to reserve it as a PDF file or a JPEG picture within the Photographs app. Moreover, you can even straight share the screenshots to messaging apps like WhatsApp or e-mail. Let’s now undergo the step-by-step technique of taking scrolling screenshots on iPhone:
Step 1: Open the Net Web page
First, open the net web page that you just wish to seize and take a traditional screenshot of the seen content material on the display screen.
Step 2: Faucet the Screenshot Preview
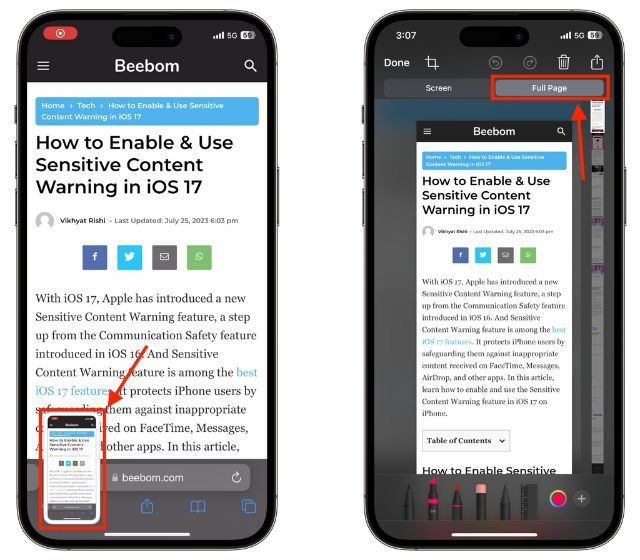
After taking the preliminary screenshot, you will notice a thumbnail preview of it on the backside left nook of the display screen. Faucet on this screenshot preview thumbnail to proceed.
Step 3: Entry the Full Web page Scroll
Now, it’s worthwhile to transfer to the “Full Web page” tab positioned on the prime proper nook of the display screen. Tapping on this tab will show the scrolling screenshot preview on the correct aspect, which you’ll be able to scroll by means of.
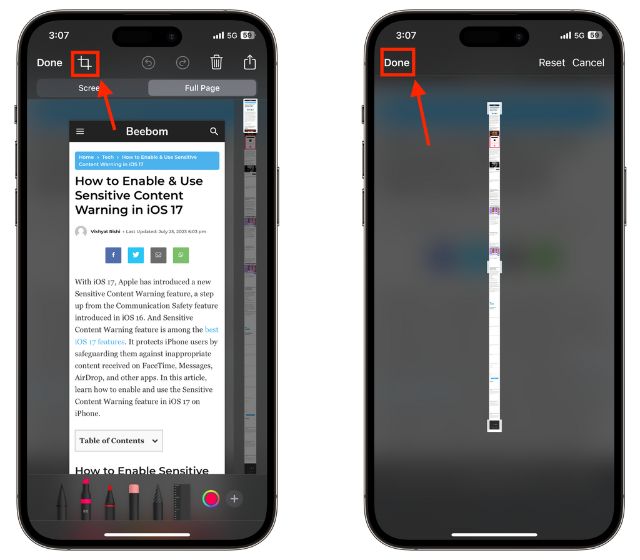
Step 4: Crop the Screenshot (Non-obligatory)
If you’d like, you may faucet the Crop icon to pick a selected space of the full-page screenshot. After making the choice, faucet Carried out to avoid wasting the modifications.
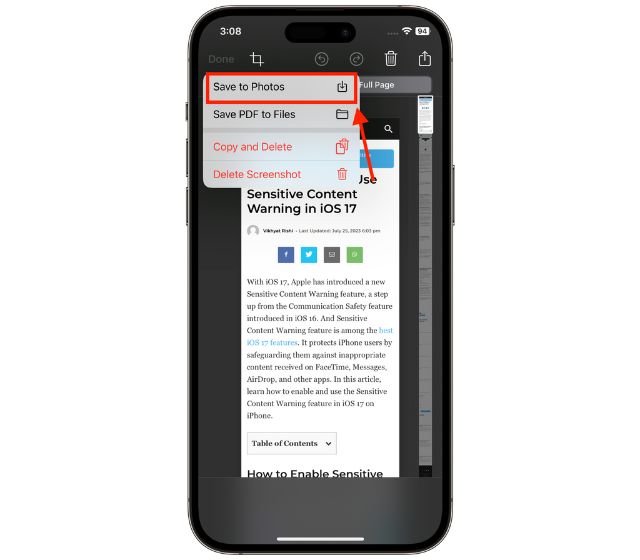
Step 5: Save the Screenshot
If you wish to share the whole screenshot, faucet on Carried out on the prime left nook of the display screen. Then, choose the “Save to Photographs” choice to avoid wasting the scrolling screenshot as a picture within the Photographs app in your iPhone.
Notice:
It’s essential have iOS 17 put in in your iPhone to avoid wasting scrolling screenshots as photographs within the Photographs app. In iOS 16 or older variations, the choice to avoid wasting screenshots as a PDF is out there as an alternative.
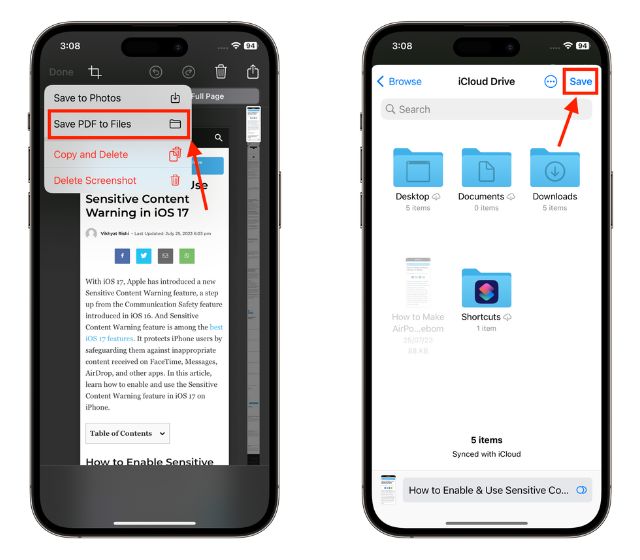
Different Choice: Save as PDF in Recordsdata
In the event you favor to avoid wasting the scrolling screenshot as a PDF file as an alternative of a picture, you may select the “Save PDF to Recordsdata” choice. It will save the screenshot within the Recordsdata app.
Sharing Scrolling Screenshots on iPhone
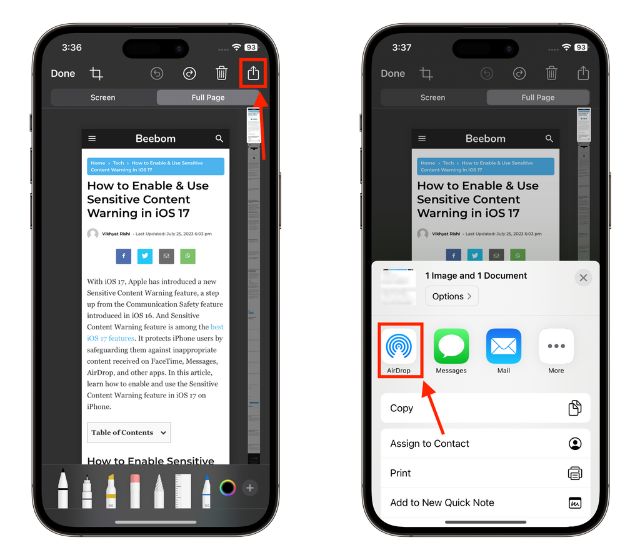
In the event you do not wish to save the scrolling screenshot, Apple gives the choice to straight share it utilizing AirDrop or completely different apps from the preview display screen in your iPhone. Here is how:
Step 1: Entry the Share Icon
Whereas on the screenshot preview display screen, faucet on the Share icon positioned on the prime proper nook.
Step 2: Select the Sharing App
From the choices displayed, select the app you wish to use for sharing the screenshot. For instance, you may choose AirDrop to ship it to a close-by Apple gadget.
Viewing Scrolling Screenshots on iPhone
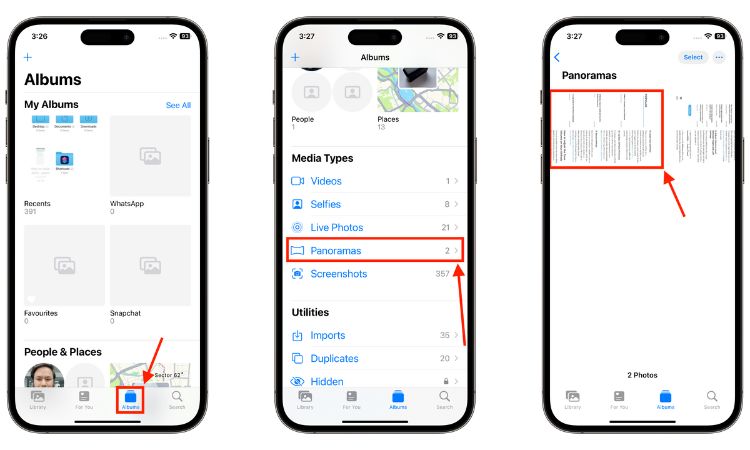
Upon getting saved the scrolling screenshots as photographs in your iPhone, you may simply view them within the “Panoramas” folder inside the Photographs app. Here is how:
Step 1: Open the Photographs App
Launch the Photographs app in your iPhone and go to the Albums tab positioned on the backside of the display screen.
Step 2: Entry the Panoramas Folder
Scroll down and discover the Panoramas folder inside the Albums part. Choose it to proceed.
Step 3: View the Scrolling Screenshot
Within the Panoramas folder, one can find the scrolling screenshot tile. Faucet on it to view the whole screenshot.
 link
link